# Using Zapier App
With the Zapier app installed on your workspace by the workspace administrator, you can start using the integration by simply going to the [Zapier platform ](https://zapier.com/)and creating Zaps with the `Rocket.Chat` app.
To verify the installation of the app, navigate to **Administrator** > **Apps** > **Installed**
{% hint style="info" %}
The Rocket.Chat app on the Zapier platform can function both as a trigger and an action in creating your Zap. For a comprehensive list of available actions and triggers, refer to this list [#rocket.chat-zapier-actions-and-triggers](https://funke-olasupo.gitbook.io/user-guide/6.5/extend-rocket.chat-capabilities/rocket.chat-marketplace/rocket.chat-public-apps-guides/zapier-app/..#rocket.chat-zapier-actions-and-triggers "mention")
{% endhint %}
To illustrate the integration's functionality, we have provided some example Zaps:
* Using Rocket.Chat Trigger to Rocket.Chat Action
* Rocket.Chat Trigger to External Action
* External Trigger to Rocket.Chat Action
## Zapier Rocket.Chat Trigger to Rocket.Chat Action
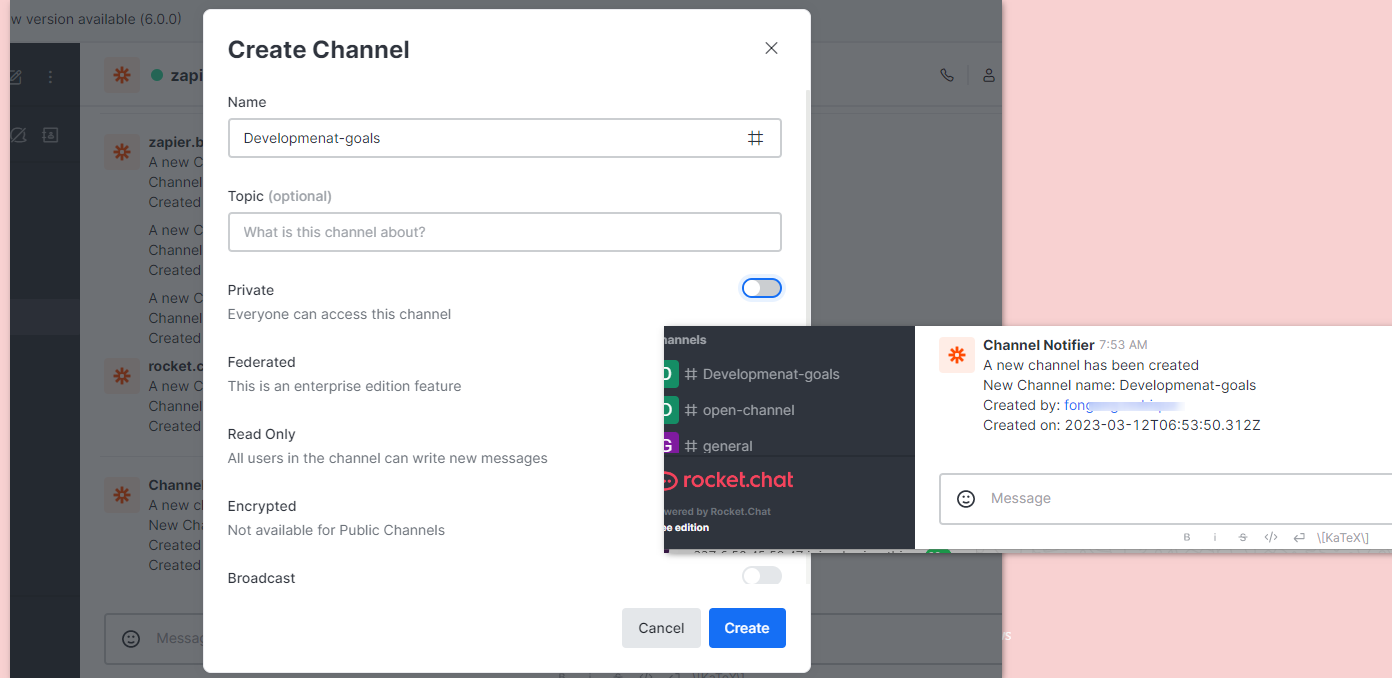
This example makes use of the Rocket.Chat `New channel` trigger and the `Send direct message` action.
This sends a [Direct Message](https://funke-olasupo.gitbook.io/user-guide/6.5/use-rocket.chat/user-guides/rooms/direct-messages) to a user when a new Channel is created.
Zapier Send a Direct Message when a new Channel is created
Follow these steps to create the zap.
* Log in to your [Zapier dashboard](https://zapier.com/app/dashboard)
* Click on **+Create Zap** to begin creating a new Zap
* Search and select the `Rocket.Chat` app as Trigger
* In the event field, select the `New channel` event
* In the Account settings, click **Sign in** to your Rocket.Chat workspace. A window pops up requesting your workspace URL
* Fill in your workspace BaseURL then click **Yes, continue**
* **Authorize** with the Rocket.Chat OAuth to link the currently logged-in user

* Click **Continue** after a successful connection then **Test Trigger**
After Configuring the Zapier Trigger, the next step is configuring the Action.
* Search and select the `Rocket.Chat` app as the Action app
* In the event field, select the `Send direct message` event and **Continue**
* Select the Rocket.Chat workspace linked above or connect another Rocket.Chat workspace to use
* Configure the desired field in the action section to format the message structure using the example data available
* **Message**: The message text to send.
* **User**: Select the user to be DMed.
* **Alias**: The user to send the message as.

* Click **Continue** then **Test action**. You receive a test message formatted as configured.
* **Publish** and **Turn On** the Zap
After creating the Zap, you can test its functionalities by [Creating a new Channel](https://funke-olasupo.gitbook.io/user-guide/6.5/use-rocket.chat/user-guides/rooms/channels/create-a-new-channel) and confirm you received a message from the `zapier.bot` with the Alias you configured with information about a newly created channel.
## Zapier Rocket.Chat Trigger to External Action
This example makes use of the Rocket.Chat `New message posted on public channel` trigger and the Google Sheets `Create Spreadsheet Row in Google Sheets` action.
This creates a Google Sheet row to an existing sheet when a message is posted in any public Rocket.Chat [Channel](https://funke-olasupo.gitbook.io/user-guide/6.5/use-rocket.chat/user-guides/rooms/channels).
Zapier Create Google Sheet row when a message is posted in a public Channel
Follow these steps to create the zap.
* Log in to your [Zapier dashboard](https://zapier.com/app/dashboard)
* Click on **+Create Zap** to begin creating a new Zap
* Search and select the `Rocket.Chat` app as Trigger
* In the event field, select the `New message posted on public channel` event
* In the Account settings, click **Sign in** to your Rocket.Chat workspace. A window pops up requesting your workspace URL
* Fill in your workspace BaseURL then click **Yes, continue**
* **Authorize** with the Rocket.Chat OAuth to link the currently logged-in user

* Click **Continue** and choose the public Channel to listen in on your workspace then **Test Trigger**
After Configuring the Zapier Trigger, the next step is configuring the Action.
* Search and select the `Google Sheets` app as the Action app
* In the event field, select the `Create Spreadsheet Row` event and **Continue**
* In the Account settings, click **Sign in** to authenticate and connect your Google account
* Select the desired **Drive**, **Spreadsheet**, and **Worksheet** to write to
* Set the data to be inputted under the respective Sheet column

* Click **Continue** then **Test action**. You see the sheet filled with some example data
* **Publish** and **Turn On** the Zap
After creating the Zap, whenever a message is posted in the specified channel, a Google Sheet row gets created

## Zapier External Trigger to Rocket.Chat Action
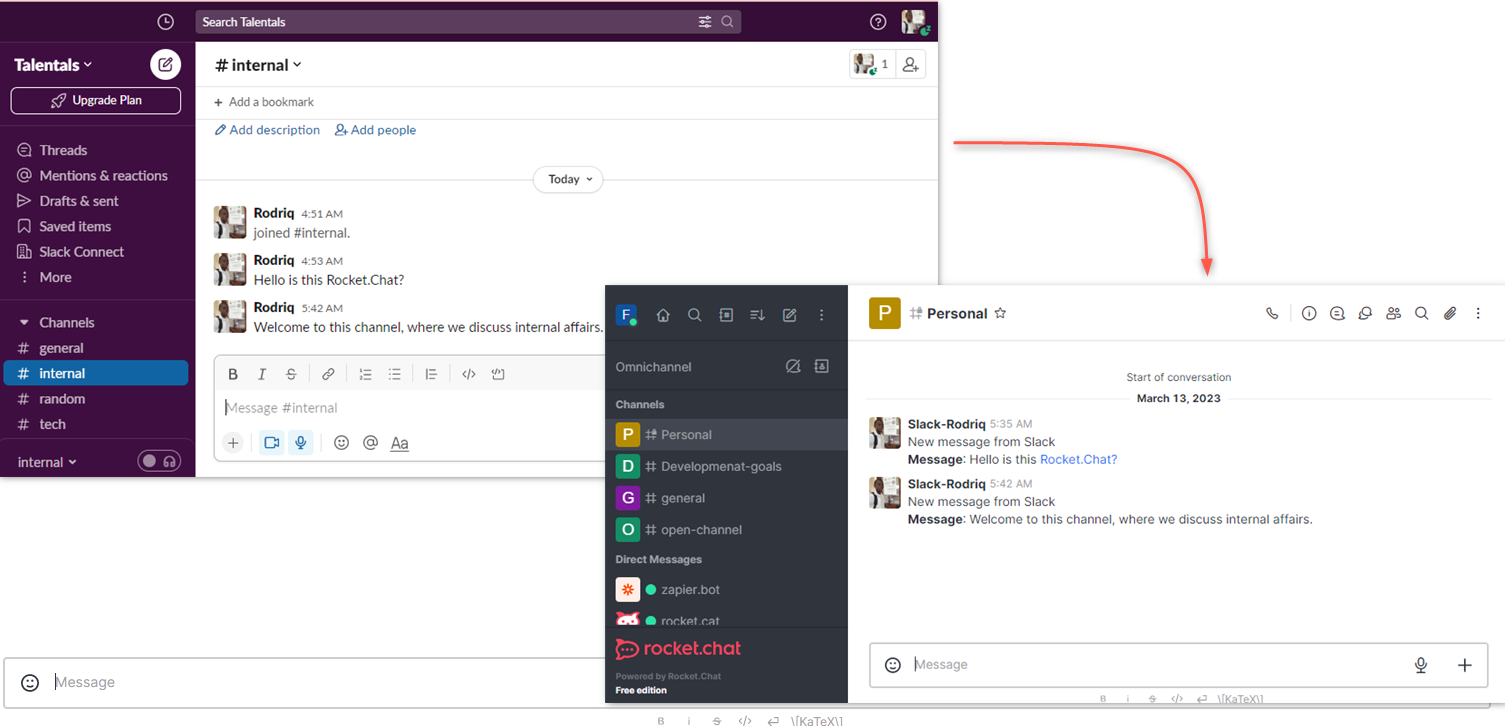
This example makes use of the `New Message Posted to Channel` in Slack trigger and the `Send private channel message` Rocket.Chat action.
This forwards any message sent in a Slack channel to a private channel in Rocket.Chat.
Zapier forward Slack Messages to Rocket.Chat Channel
Follow these steps to create the zap.
* Log in to your [Zapier dashboard](https://zapier.com/app/dashboard)
* Click on **+Create Zap** to begin creating a new Zap
* Search and select the `Slack` app as Trigger
* In the event field, select the `New Message Posted to Channel` event and **Continue**
* In the Account settings, click **Sign in** to authenticate and connect your Slack account
* Select the Slack Channel to listen to and **Continue**
After Configuring the Zapier Trigger, the next step is configuring the Action.
* Search and select the `Rocket.Chat` app as the Action app
* In the event field, select the `Send private channel message` event and **Continue**
* Select a linked Rocket.Chat workspace **Sign in** to a Rocket.Chat workspace to use
* Configure the desired field in the action section to format the message structure using the example data available
* **Message**: The message text to send.
* **Group**: The private Rocket.Chat group to post the message in.
* **Alias**: The user to send the message as.

* Click **Continue** then **Test action**. You receive a test message in then private group formatted as configured
* **Publish** and **Turn On** the Zap
After creating the Zap, whenever a message is posted in the specified Slack Channel, it gets forwarded to a Rocket.Chat private Channel.