Keycloak
Configuring Keycloak OpenID Connect
To create a client in Keycloak,
Provide a Client ID:
rocket-chat-clientSelect the Client Protocol as
openid-connect.Select the Client access type as confidential.
Standard flow implemented: ON
Valid Redirect URL:
http:{Rocket.Chat_server_address}/*
Ensure the Redirect URI is the IP and PORT of your rocket.chat instance.
After saving the changes, a new credentials tab will be created for the client. This credentials tab will provide the client secrets to be used when configuring the Rocket.Chat.
Configuring Rocket.Chat
Create a Custom Oauth provider
Login to Rocket.Chat with an administrator account and navigate to the OAuth page.
Click the Add custom OAuth button and provide the following configurations.
URL:
http://{keycloak_ip_address}:{port}Token Path:
/realms/{realm_name}/protocol/openid-connect/tokenToken sent via: Header
Identity Token Sent Via: Same As "Token Sent Via"
Identity Path:
/realms/{realm_name}/protocol/openid-connect/userinfoAuthorize Path:
/realms/{realm_name}/protocol/openid-connect/authScope:
openidParam Name for access token:
access_tokenId: This is the id of the Rocket.Chat client created in the keycloak
rocket-chat-clientSecret: Secret key provided in the credentials tab when creating the Rocket.Chat client
Button Text:
Login with Keycloak
You can also access the URL paths provided in the configurations by navigating to the Realm setting > General and clicking the endpoints link. While configuring the settings, replace the realm_name with the appropriate realm name. The default realm provided by Keycloak is master.
Leave the rest of the configurations as default. Click Save Changes.
Enable the new Keycloak provider. Click Refresh OAuth Services.
If you are in a test environment with no SMTP server set, disable Two-factor Authentication in Administration > Settings > General.
A Login with KeyCloak button appears on your workspace's login page. Users can now log in with keycloak.
Mapping non-federated keycloak user roles to Rocket.Chat roles
Client-specific roles of a keycloak managed user can be mapped to Rocket.Chat roles. This does not work for federated users (e.g., LDAP-managed users). For this example, to map the admin and livechat-manager role, add the required roles to the client.
To create a role in KeyCloak,
Navigate to Roles and click Add Role.
Fill in the name and description of the role, and then click Save.
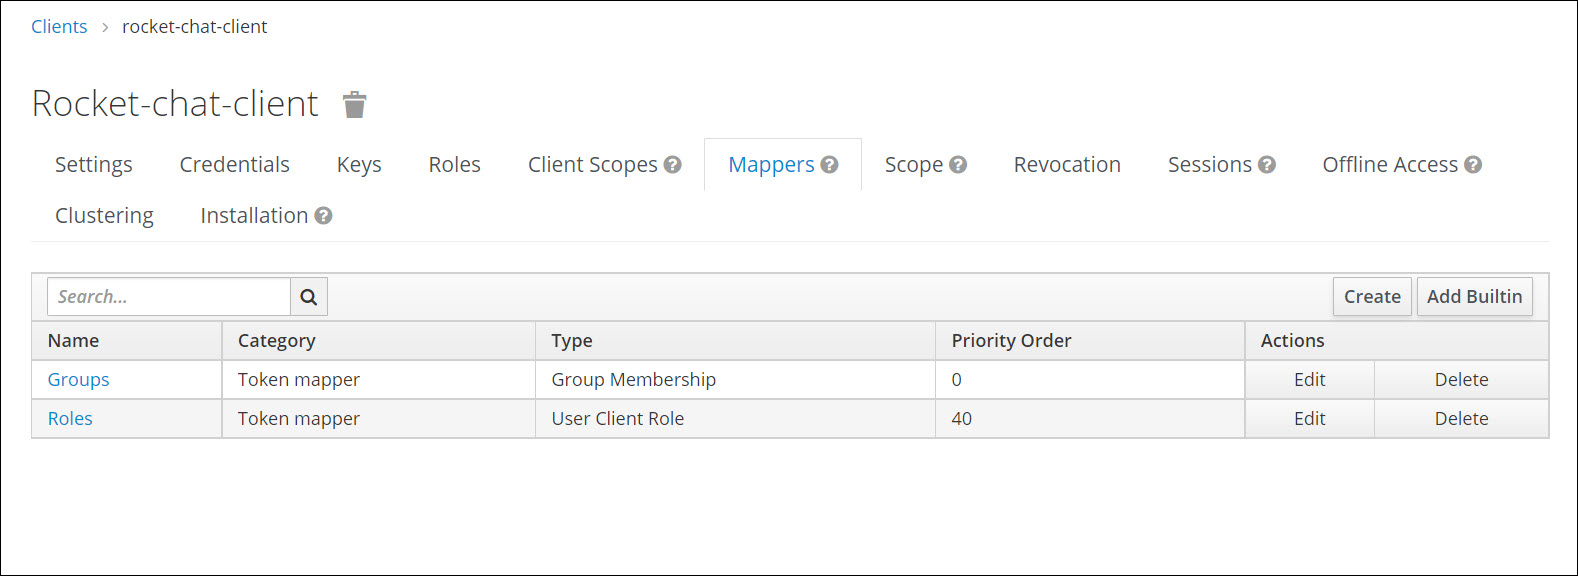
Add a mapper entry that maps our client roles to OpenId, passing the value to Rocket.Chat.
View all client roles
To view all the client roles you have created,
Navigate to Roles and click View all roles
Composite Roles
A composite role is a role that can be associated with other roles.
To define composite roles,
Navigate to Roles > Composite Roles.
To grant the Rocket.Chat role to a user, we have to modify the users Role Mappings.
Create Protocol Mapper

Mappers